
Tutorial: How to Create Proxies in Adobe Premiere Pro

Creating Proxies in Premiere Pro
In this Adobe Premiere Tutorial I go over the process of creating and utilizing proxy files for the times when your footage is a bit better than the computer you're using.
Leave a comment below if you have any questions. Please subscribe if you want more Adobe relate tutorials.
Creating Proxies is an extremely powerful way to improve your workflow and make it even more efficient.
<br />(adsbygoogle = window.adsbygoogle || []).push({});<br />
Why use Proxies?
I believe it is very necessary to know how and when to use proxies. I once sat on a video project because I filmed it in 4k well before I had the equipment to handle it.
You get to a point where spending more money on a higher end computer will only get you so far before using proxies as a better alternative.
When you begin shooting RAW video or even 4k, while some computers can handle it, most computers will bog down and run annoyingly slow this is where Proxies become extremely helpful.
How to create Proxies in Adobe Premiere
The easiest way to get started creating proxies in Adobe Premiere is to do it in the project settings when you start a new project.
1. In the project creation panel select "ingest settings".
<img src="https://images.squarespace-cdn.com/content/v1/58ee57f8e4fcb5c5c7509b27/1516594286023-2DO6TGYYH1LTP3Y6V8IM/Adobe+Premiere+Proxy_1.png" alt="Adobe Premiere Proxy_1.png">

2. Inside of ingest settings Check the box that says "Ingest".
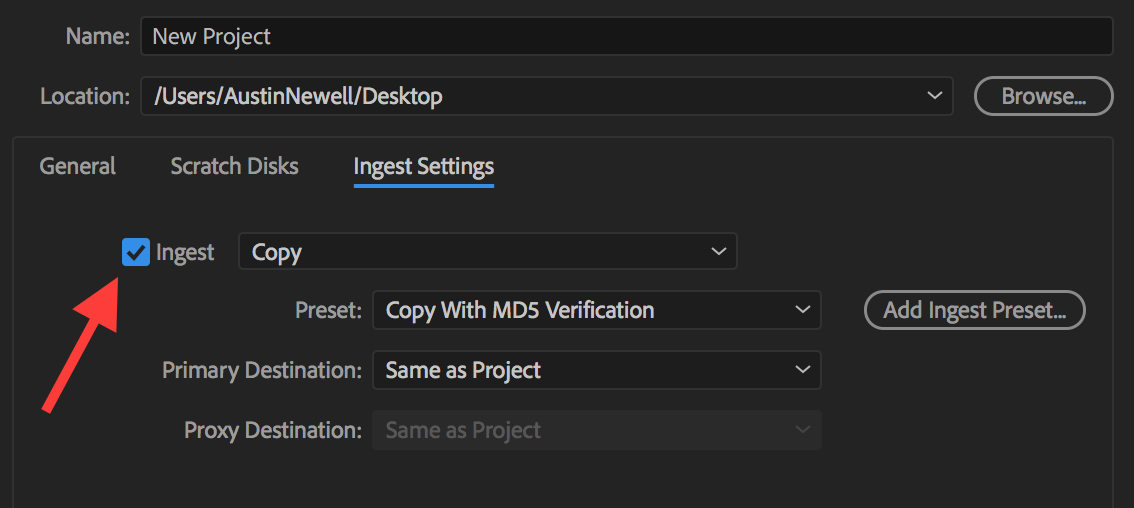
3. Change "Copy" to "Create Proxies".

4. Inside the "Preset" Change it to a resolution and codec that you prefer, anything that will fit with your aspect ratio of footage, after that hit OK and your project will open up.

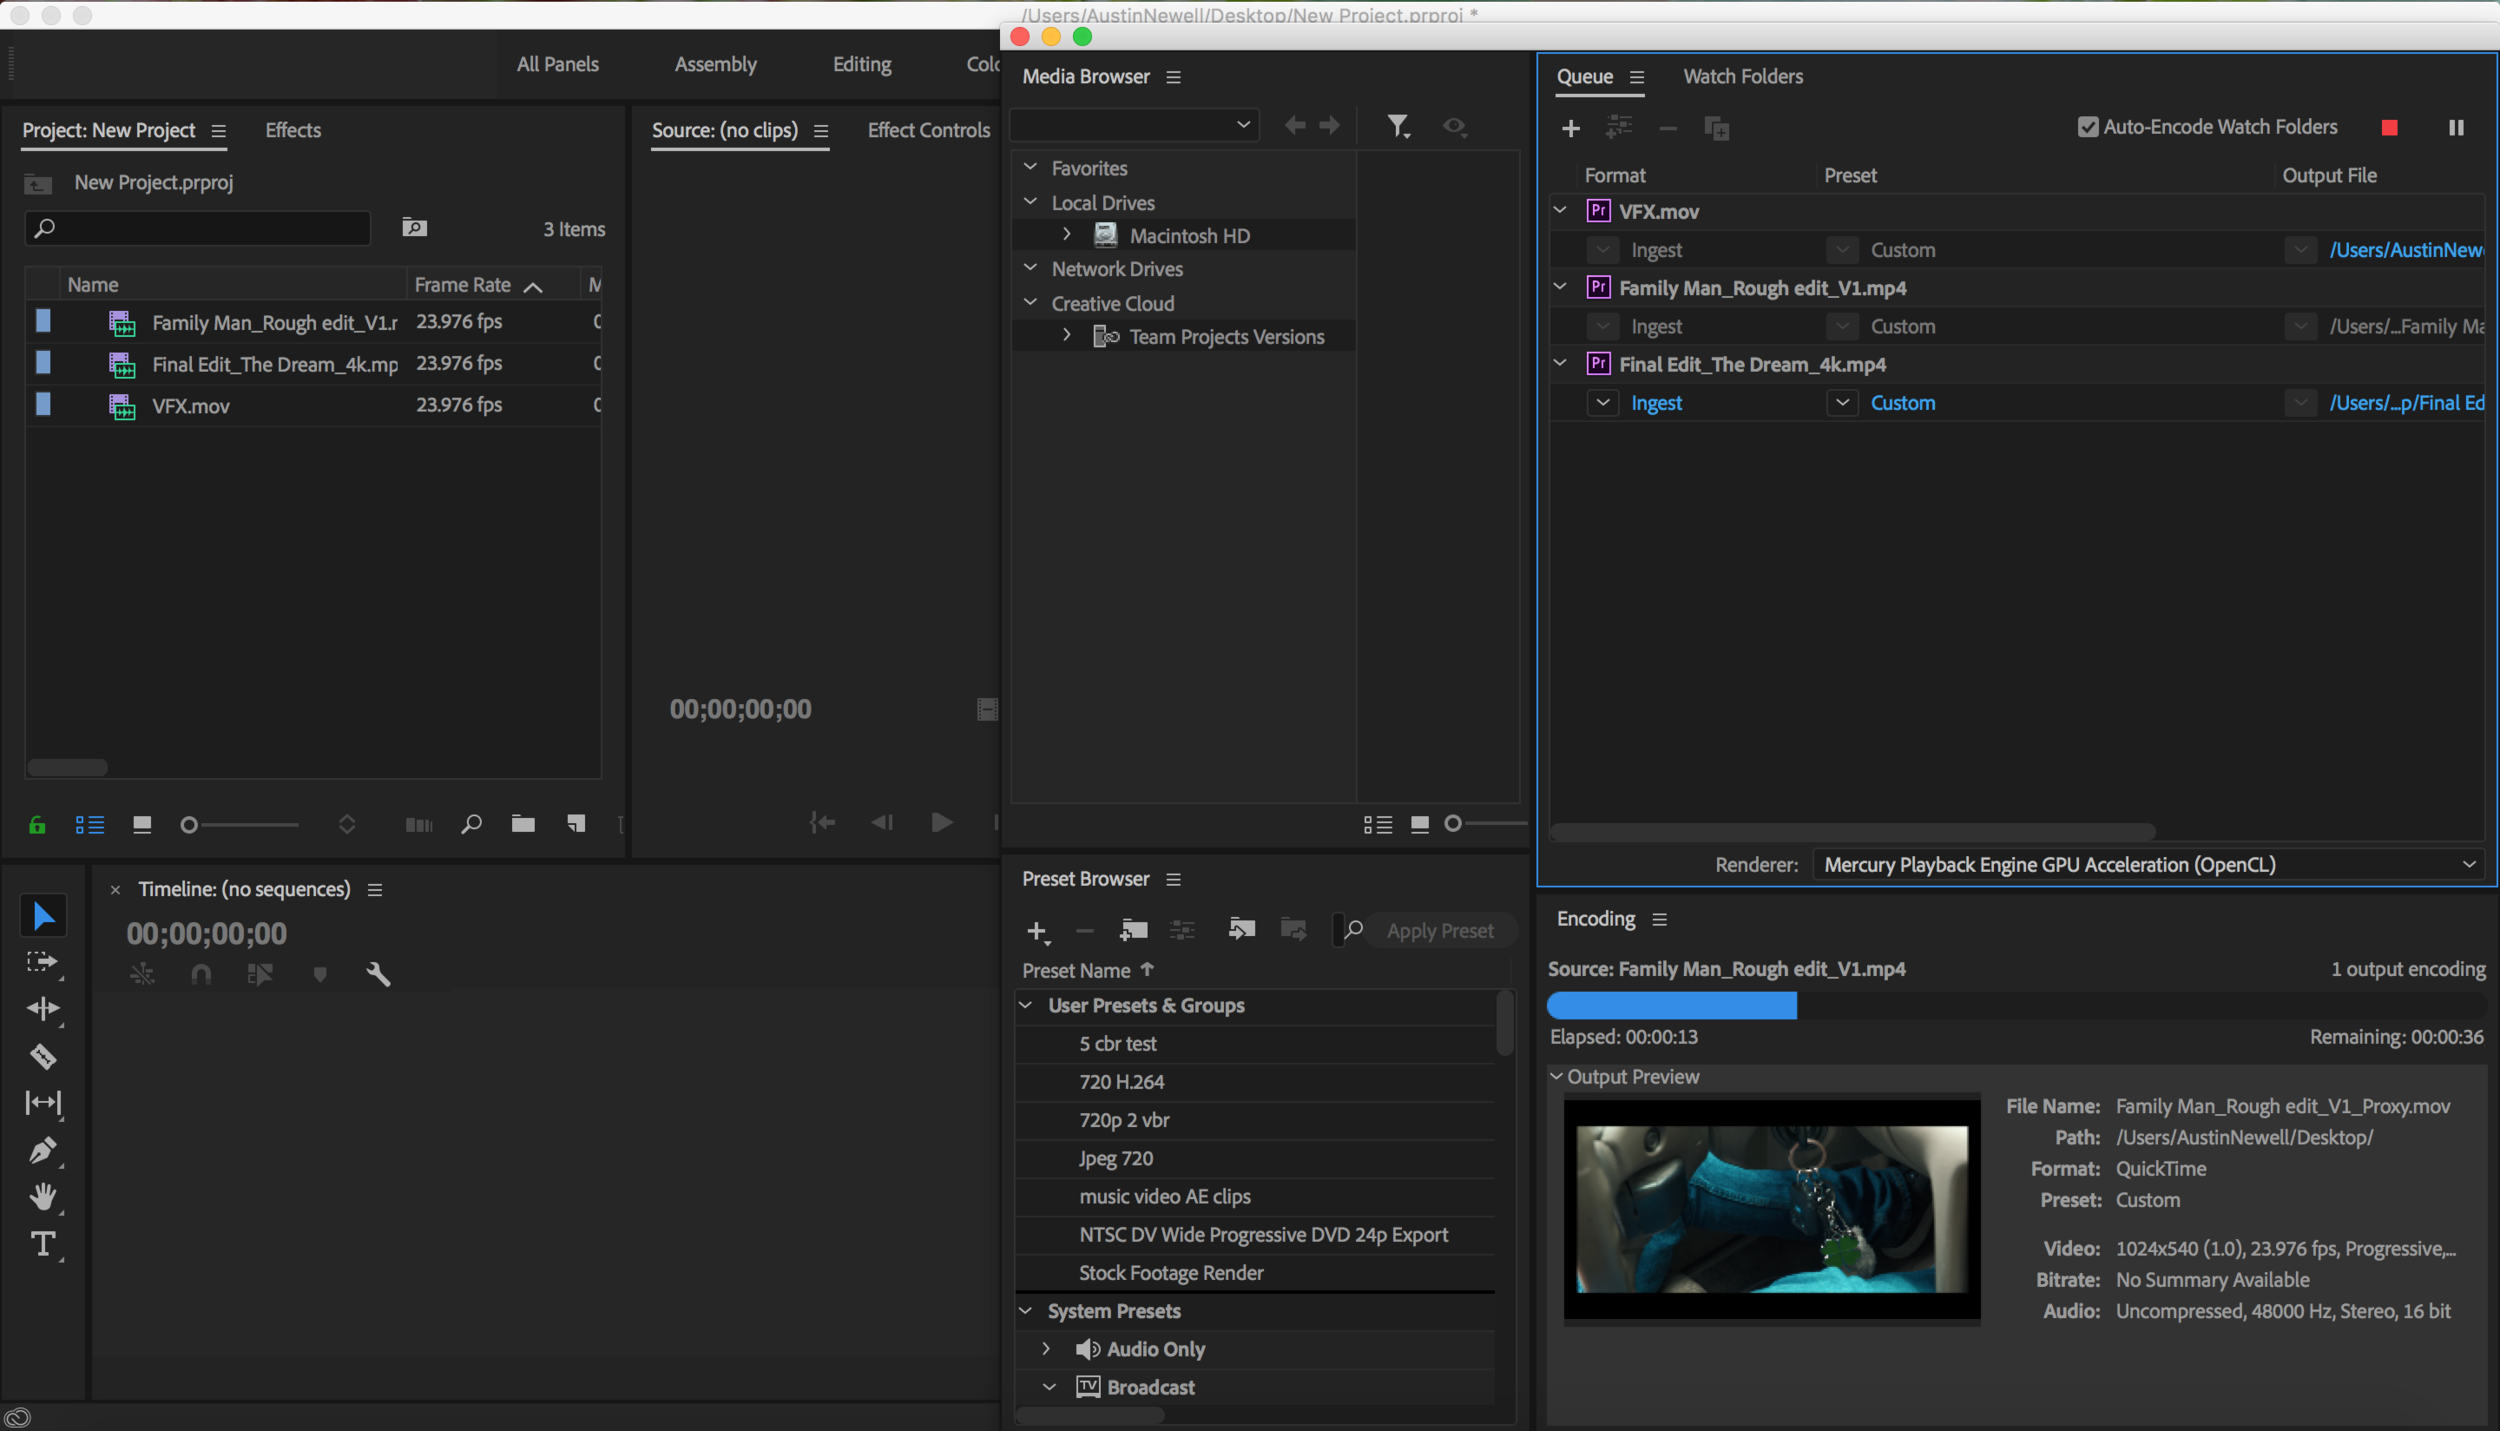
5. Once you import your footage into the project Adobe Encoder will automatically open up and begin rendering your clips with your chosen preset.
6. Inside of your project go over to your program monitor and hit the plus sign.

7. Once the button editor pops up find the icon titled "Toggle Proxies". This is going to be a drag and drop icon that you drag from the button editor down to the blue highlighted box below then click OK.

8. Once you have footage in your timeline hit this button to activate it. As long as this button is activated you will be viewing and editing your proxy files.

9. When you are done editing and ready for color grading and exporting go ahead and click this button again to deactivate it and you will be viewing and editing your original RAW Hi-res files.
*Added Notes from Reddit User, https://www.reddit.com/user/VincibleAndy
-Generally you dont want your proxies to be h.264. One of the reasons to use proxies is to get away from that codec entirely. DNx or Pro Res are much better for this (DNxHR LB and Pro Res Proxy respectively).
-You can create your own ingest settings in Media Encoder and import than in the ingest dialog window, next to the drop down menu.
-As always, be sure your aspect ratio and audio channels match 100%. This is why you are getting pillar boxing on your proxies.
-A tip for the future: Watermark your proxies. Its an easy way to immediately tell if what you are viewing is a proxy and its very helpful.
I hope this tutorial was helpful and you were able to follow along and learn something new! Let me know if you have any questions about this below!
Also let leave a comment about any future tutorials you would be interested in seeing!