Film School Project: Basic 3 Point Lighting

I have started a new course called Location Lighting and I am absolutely loving it.
Adding a little knowledge of lighting will drastically change the way your films look.
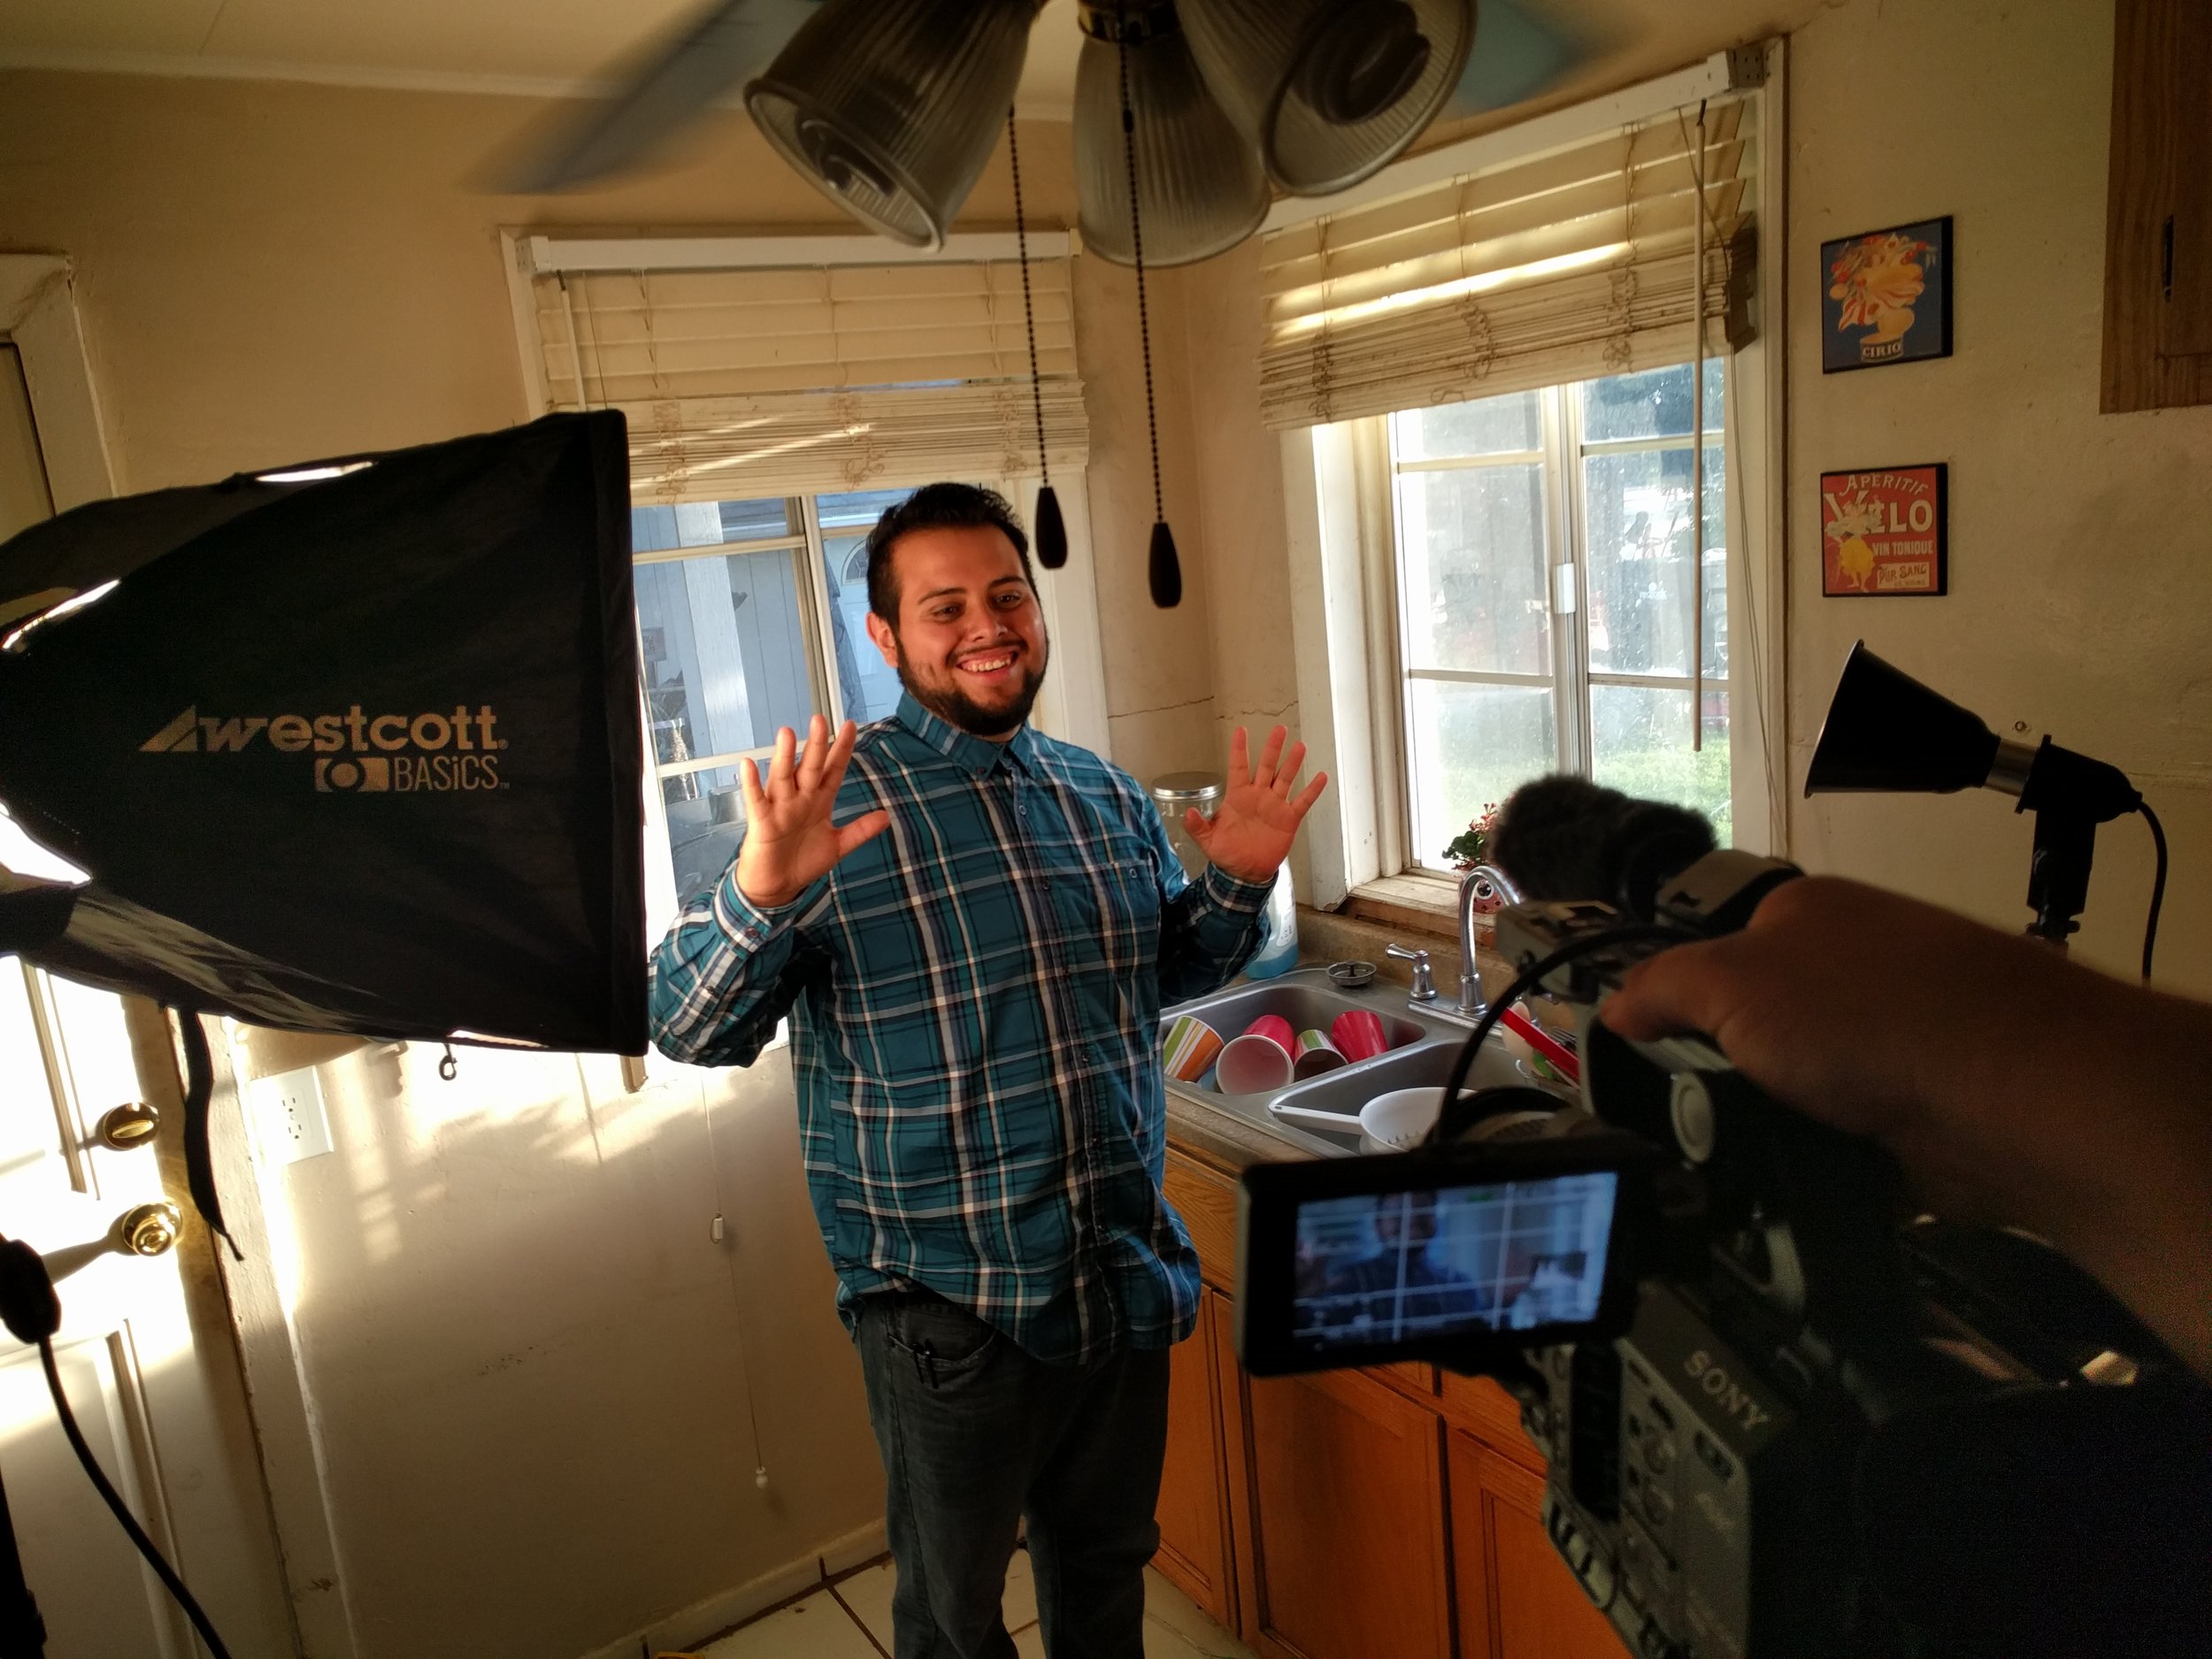
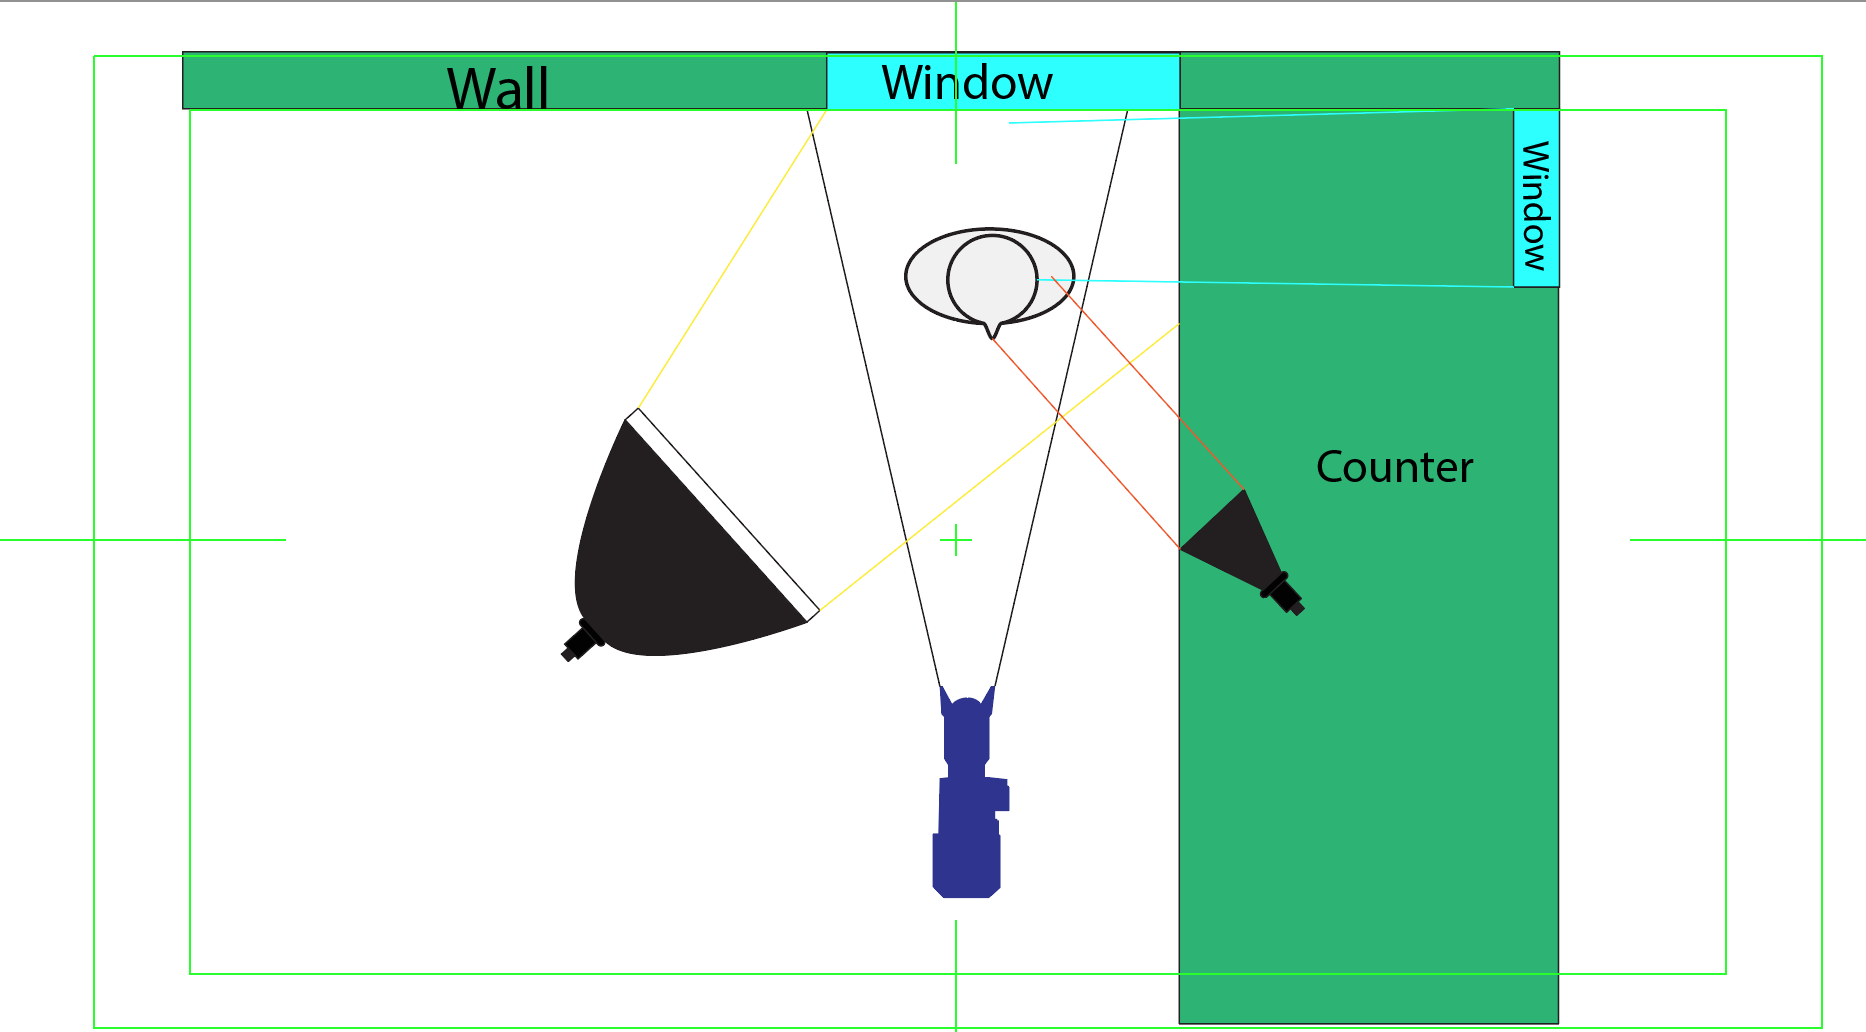
We were just tasked with shooting a basic 3 point lighting set up and providing a lighting layout to show how we shot it, along with a bts photo to see how everything looking and a short synopsis of why we did what we did.
Here's the photo I submitted. It is ungraded and a straight screen shot from the video camera.
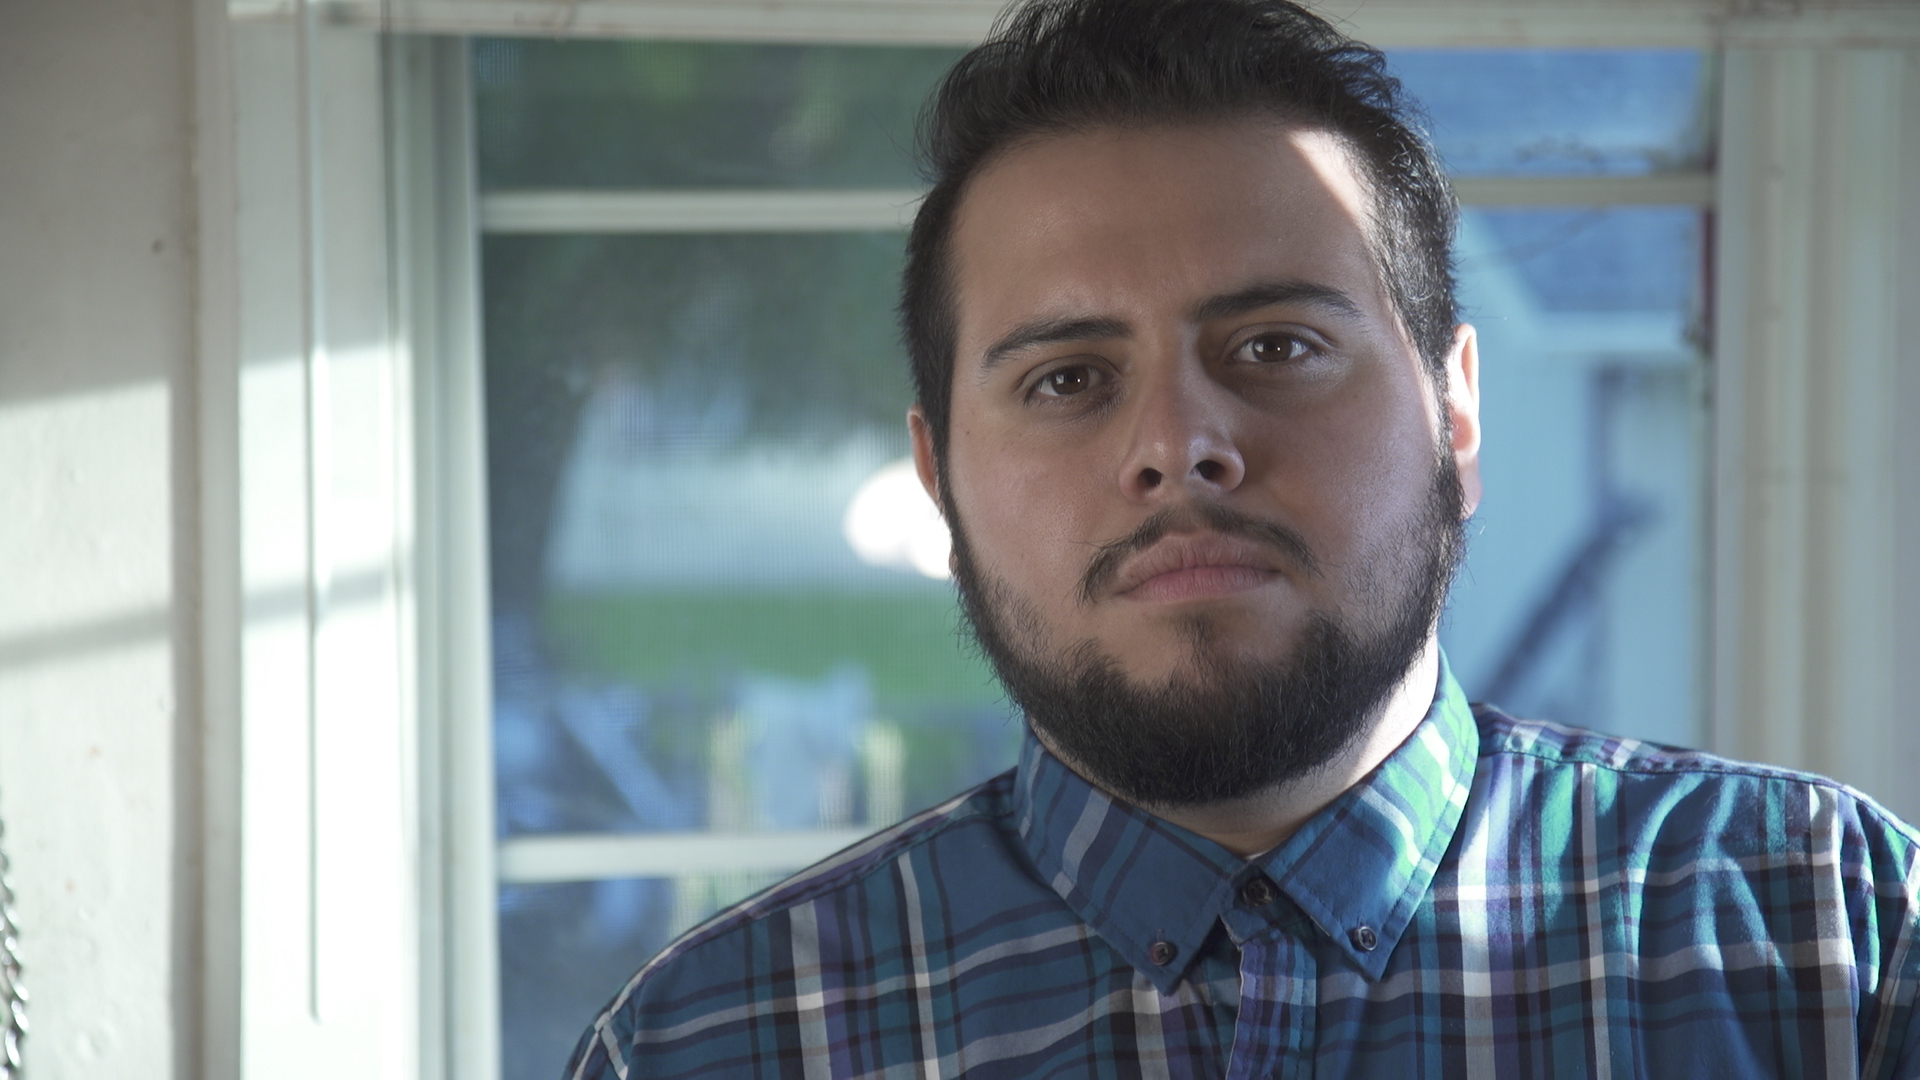
I had my friend Michael be the model for this.
I chose this scene because I my hands were tied on how much flexibility I had with equipment.
I didn't have access to my reflector or bounce card and one of my 500w light bulbs were broken.
So I chose an inside shot and used the strong light from a window to act as an edge light to separate the subject.
I used my only 500w with a diffuser on it as a key light to light his face and add catch lights.
Lastly I used the 100w with a cone reflector on it as a fill for his face.
Here is the lighting diagram and bts to help show where my lights were placed.
Once I took what was needed for class, I swapped over for my DSLR so I could shoot a higher quality version of the photo in RAW.
Here is how that photo came out.